
In our last post, we talk about setting custom domain to our Github Pages project. Today, I am going to show you how to install SSL certificate on your Github Pages project with custom domain for free, yes, you read that right, it is completely free. So just follow along and if you face any issues during the process, please ask your questions in the comment and I will try to answer them all.
Just so you know, if you don’t already know this, GitHub Pages doesn’t yet support SSL on GitHub Pages for custom domains so we are gonna use Cloudflare’s Universal SSL. Using Cloudflare will give us two benefits, first of course is the SSL for our Github Pages project/site, and second is it is going to give our site the power of CDN. To know how to get it all for free, follow the below steps. I am assuming you have followed my previous post and already setup custom domain for your Github Pages project/site.
- Create an account on Cloudflare, if you don’t already have one.
- Click on Add Site link on the top right hand side corner of the page.

- Enter the domain name and click on begin scan button.
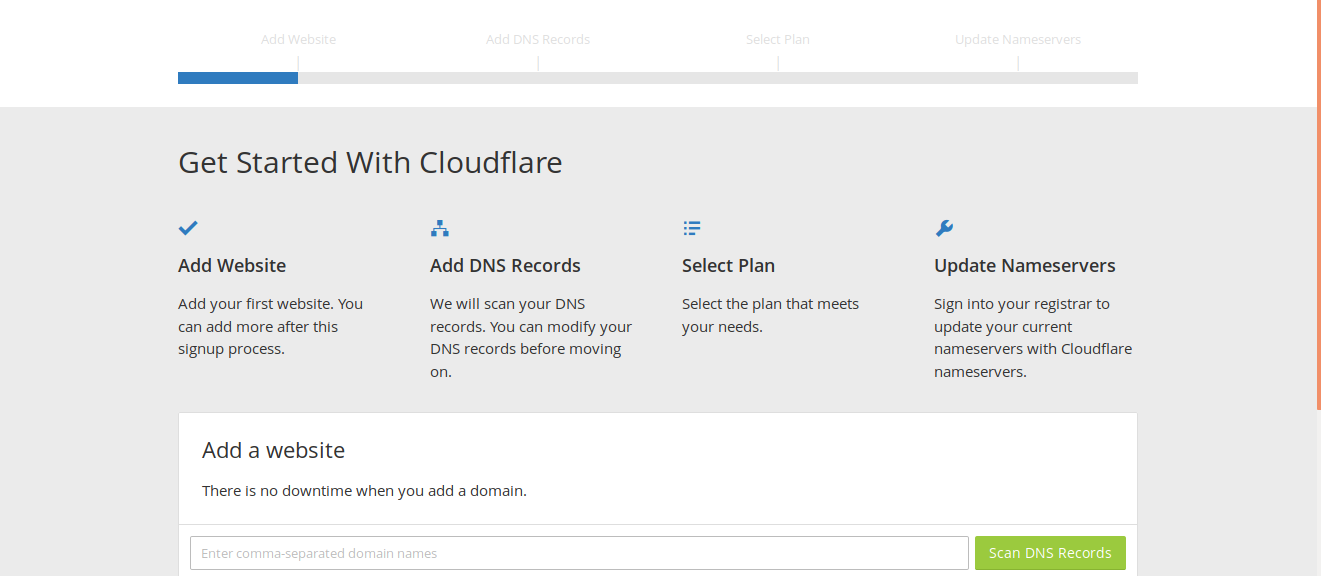
- After scanning is done, click on continue button, Cloudflare will show all the DNS entries of your domain name which it just scanned. If any entry is missing, you can write it here manually, and click on continue.
- Cloudflare will prompt you if you want to opt for a paid plan, which of course has it’s own benefits, so choose whatever plan you like as per your requirement. But as in the beginning I said FREE, so I am going to choose Free plan. Free plan has all the basic stuff we will be needing for SSL, and cloudflare CDN. Click again on continue.
- In this step, Cloudflare will provide you with 2 name servers, so you need to login to your domain provider, and change the name servers from there to the ones provided by Cloudflare.
- Now we are done with basic things and will proceed with the SSL installation. After change the nameserver from your domain provider account, click continue. Nameservers take some times to propagate (upto 24 HRS) but in most cases it doesn’t take more then a few minutes.
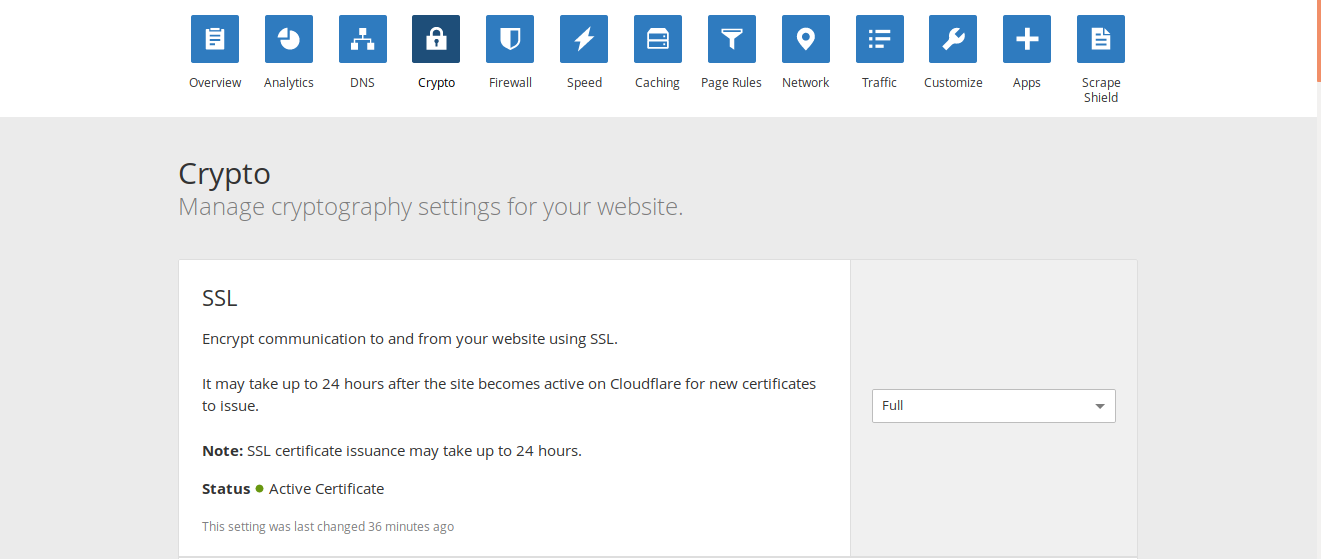
- On the next page click on Crypto button on the top and from the SSL dropdown select full.
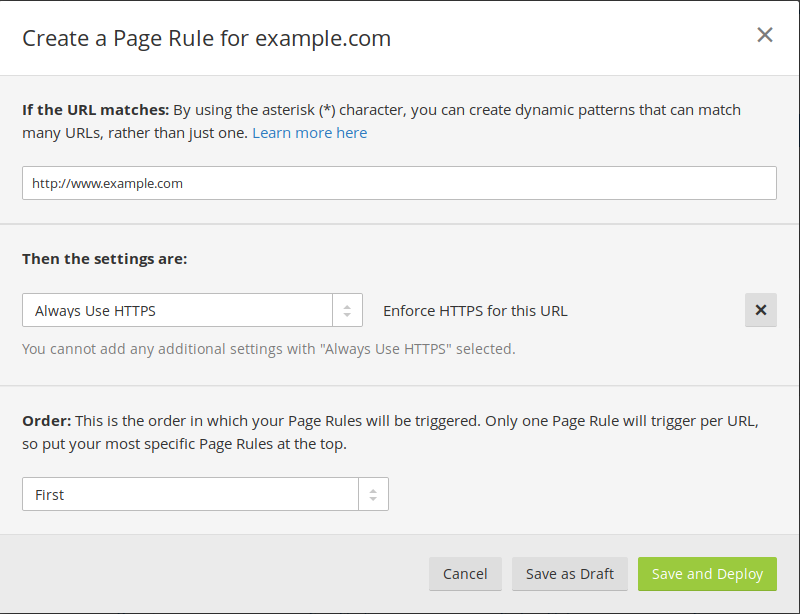
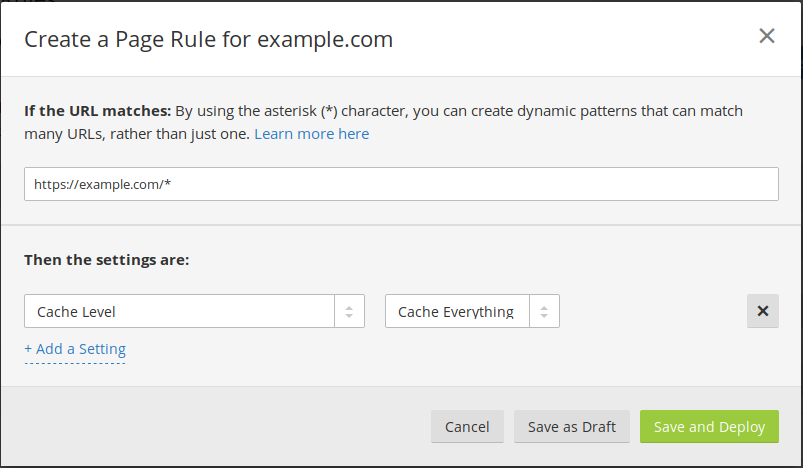
- Now click on page rules button, and on the page click on Create Page Rule button, in the popup, write your domain name (http://www.example.com), click on add a setting link, and select Always Use HTTPS from the dropdown, as you have to create more rules, make sure this rule should be on the top. On the top means this rule should be triggered first.
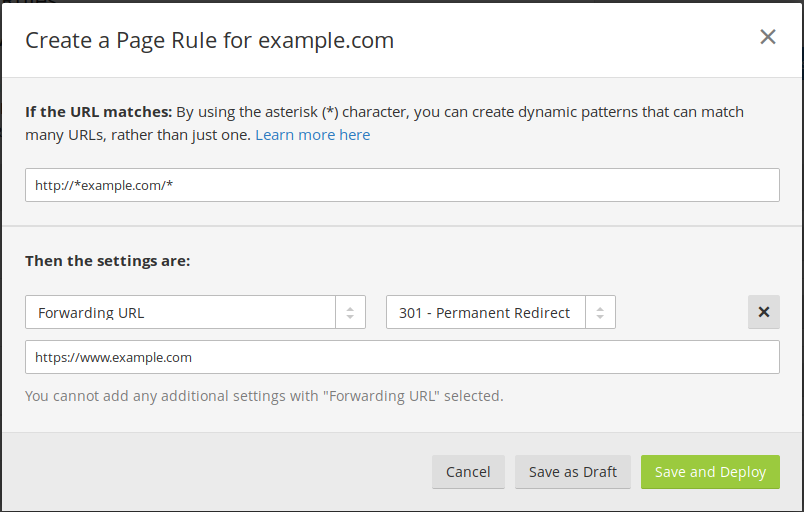
- Similarly create second page rule for permanent redirection of your non www/naked domains to www using https.
- Third page rule is to cache all the static html files so that they will be served from the Cloudflare’s CDN directly.
That’s it, you are done, now if you have done everything alright, then these changes may take a few minutes to a couple of hours to propagate (when I was doing this, it took only 2-3 minutes). So maybe after 2-3 minutes or if not then after a couple of hours you will be able to access your website on https.